Easy DIY Hair Tie Organizer Ideas
DIY Hair Tie Organisers are the simple, stylish solution to a problem I know we all face: the hair tie avalanche! Does your bathroom drawer look like a colourful explosion of elastic bands, or do they mysteriously vanish, only to reappear weeks later tangled in your brush? I’ve been there! That’s why I’m so excited to share this project with you. Imagine a beautifully crafted organiser, perhaps a sweet little wooden box or a chic wall-mounted display, neatly holding all your favourite hair ties, ready and waiting. Best of all, this project is incredibly budget-friendly, costing less than a coffee, and can be completed in under an hour! In this article, I’ll guide you step-by-step through creating your very own functional and beautiful hair tie organiser. Get ready to reclaim your drawer space and say goodbye to hair tie chaos for good!
Tame the Tangles: Your Ultimate DIY Hair Tie Organizer Guide
As a fellow hair enthusiast, I know the struggle is real. Those little fabric loops, seemingly harmless, have a knack for multiplying and scattering themselves like rebellious confetti. From the bottom of your makeup bag to the crevices of your car, hair ties seem to have a secret life of their own. But fear not! Today, we’re diving headfirst into the satisfying world of DIY organization with a project that’s as functional as it is charming: a hair tie organizer. This isn’t just about tidying up; it’s about reclaiming your sanity and adding a touch of personalized style to your space.
Why You Need This (And How Much It’ll Set You Back)
Let’s be honest, the sheer volume of hair ties can be overwhelming. This project is designed to corral them all in one accessible, attractive place. No more digging through drawers, no more lost favorites. Plus, making it yourself is incredibly rewarding and surprisingly budget-friendly.
For this project, you’ll likely need a few key items. The beauty of DIY is its flexibility, but here’s a general breakdown:
* A base material: This could be a piece of wood (like a 1×4 or 1×6 pine board, roughly 12-18 inches long) or a sturdy cardboard base. Wood will cost around $5-$15 depending on size and type. Cardboard can be free from a packaging box.
* Something to hang the ties on: This is where the magic happens! You have options:
* Small screw-in hooks or eye screws: You’ll need about 8-12. These are usually sold in packs of 10 or 20 for $3-$7.
* Wooden dowels (about 1/4 inch diameter): You’ll need 3-5 pieces, each about 6-8 inches long. These cost around $3-$5 for a pack.
* Metal curtain rings or even binder clips: These can be very inexpensive or even repurposed items.
* Adhesive: Depending on your base and hanging method:
* Wood glue or strong craft glue for dowels: $3-$6.
* Command Strips or similar adhesive hooks for no-drill options: $5-$10 for a pack.
* Spray paint or craft paint for decorating: $3-$8 per can/bottle.
* Optional: Sandpaper, sealant/varnish, decorative elements (washi tape, stencils, etc.).
So, for a basic wood-based organizer with screw-in hooks, you’re looking at an investment of roughly $15-$30. If you opt for a cardboard base and repurpose some materials, you can bring that cost down significantly, even to under $10!
Measure Twice, Cut Once: Planning Your Masterpiece
Before you grab any tools, take a moment to survey your current hair tie situation and your available space.
* **How many hair ties do you realistically have?** Do a quick inventory. This will help you determine how many hanging points you’ll need. If you have a massive collection, you might need a longer board or more rows of hooks.
* **Where will this organizer live?** Measure the space. Will it hang on a wall? Sit on a vanity? Be tucked inside a closet door? Knowing the dimensions of your intended spot is crucial. For a wall-hanging organizer, consider leaving at least 1-2 inches of space around the edges for a clean look.
* **What style suits your space?** Are you going for minimalist chic, bohemian vibes, or something more whimsical? Think about the colors and textures already present in the room where it will live.
For a standard wall-hanging organizer, I’d recommend a base that’s around 12-18 inches long and 4-6 inches wide. If you’re using dowels, space them about 3-4 inches apart on your base. If you’re using hooks, aim for at least 1.5-2 inches between them to give your hair ties some breathing room.
### The Step-by-Step Transformation
Ready to get your hands dirty (in the best way possible)? Here’s how we’ll bring this organizer to life:
1. **Prepare Your Base:** If you’re using a wooden board, start by giving it a light sanding. This will smooth out any rough edges and prepare the surface for painting or staining. If you’re using a cardboard base, ensure it’s clean and free of any tape or labels. You might want to reinforce it with a second layer of cardboard glued underneath for added sturdiness, especially if you have a large hair tie collection.
2. **Mark Your Hanging Points:** Using a ruler and a pencil, lightly mark where your hooks or dowels will go. For hooks, measure from the top edge of your board down about 1-1.5 inches and then mark your spacing along the length of the board. For dowels, if you’re using them horizontally, you’ll mark points for gluing them securely to the base. If you’re using dowels vertically, you’ll mark points for drilling holes.
3. **Install Your Hanging Hardware:**
* **For Screw-In Hooks:** If using wood, carefully screw the eye screws or hooks into your marked points. Pre-drilling a small pilot hole with a 1/16 inch drill bit can make this easier and prevent the wood from splitting. For cardboard, you might need to reinforce the area behind where the hook will go with a small piece of wood or extra cardboard before screwing it in, or consider using very thin screws and backing them with washers.
* **For Wooden Dowels (Horizontal):** Apply a generous line of wood glue along the back of your dowel and press it firmly onto your marked line on the base. Hold it in place for a minute or two, and then allow it to dry completely according to the glue manufacturer’s instructions (usually 24 hours for full strength). Repeat for all dowels.
* **For Wooden Dowels (Vertical):** If you’re attaching dowels vertically, drill holes through your base at the marked points, ensuring the holes are slightly smaller than the dowel diameter so they fit snugly. Apply a bit of wood glue into the hole and then tap the dowel firmly into place.
4. **Decorate Your Organizer:** This is where your personality shines!
* **Painting:** Apply spray paint or craft paint. Multiple thin coats are better than one thick one. Let each coat dry completely before applying the next.
* **Staining:** If you prefer a natural wood look, apply wood stain according to the product instructions.
* **Washi Tape/Stencils:** Get creative with decorative tape or use stencils with contrasting paint colors for added flair.
5. **Seal and Protect (Optional but Recommended):** Once your paint or stain is completely dry, consider applying a sealant or clear varnish. This will protect your organizer from wear and tear and give it a professional finish.
6. **Attach Hanging Mechanism:**
* **For Wall Mounting (Drilling):** If your organizer is wood and you can drill, attach D-rings or a sawtooth hanger to the back of the board, ensuring they are securely fastened.
* **For No-Drill Options:** Use heavy-duty Command Strips or similar adhesive hooks. Follow the product instructions carefully for application and weight limits.
### Adapting for Small Spaces and Rentals
The beauty of this DIY is its adaptability. If you live in a small apartment or a rental property where drilling is a no-go, don’t despair!
* **No-Drill Base:** Opt for a sturdy piece of thick cardboard. You can even glue two pieces together for extra strength.
* **No-Drill Hanging:** This is where Command Strips are your best friend. Make sure to choose strips rated for the weight of your organizer plus all your hair ties. You can also use adhesive hooks designed for hanging pictures.
* **Dowel/Hook Alternatives:** Instead of screwing hooks directly into a wooden board, consider attaching them to a painted cardboard base using strong craft glue or even small bolts with nuts and washers for a secure hold. For dowels, you can glue them directly onto a reinforced cardboard base.
Another fantastic no-drill option is to create a free-standing organizer that sits on your dresser or vanity. You can build a simple box frame or use a decorative tray and attach your hanging elements to that.
### Styling Notes: Making It a Decor Piece
Your hair tie organizer doesn’t have to be a utilitarian eyesore. With a little thought, it can become a stylish addition to your room!
* **Color Palette:** Choose colors that complement your existing decor. Think soft pastels for a serene bedroom, bold brights for a more energetic space, or natural wood tones for a Scandinavian feel.
* **Texture Play:** If your organizer is plain wood, consider adding some textured elements. You could wrap sections with twine, use a stencil with a raised texture medium, or even decoupage fabric onto it.
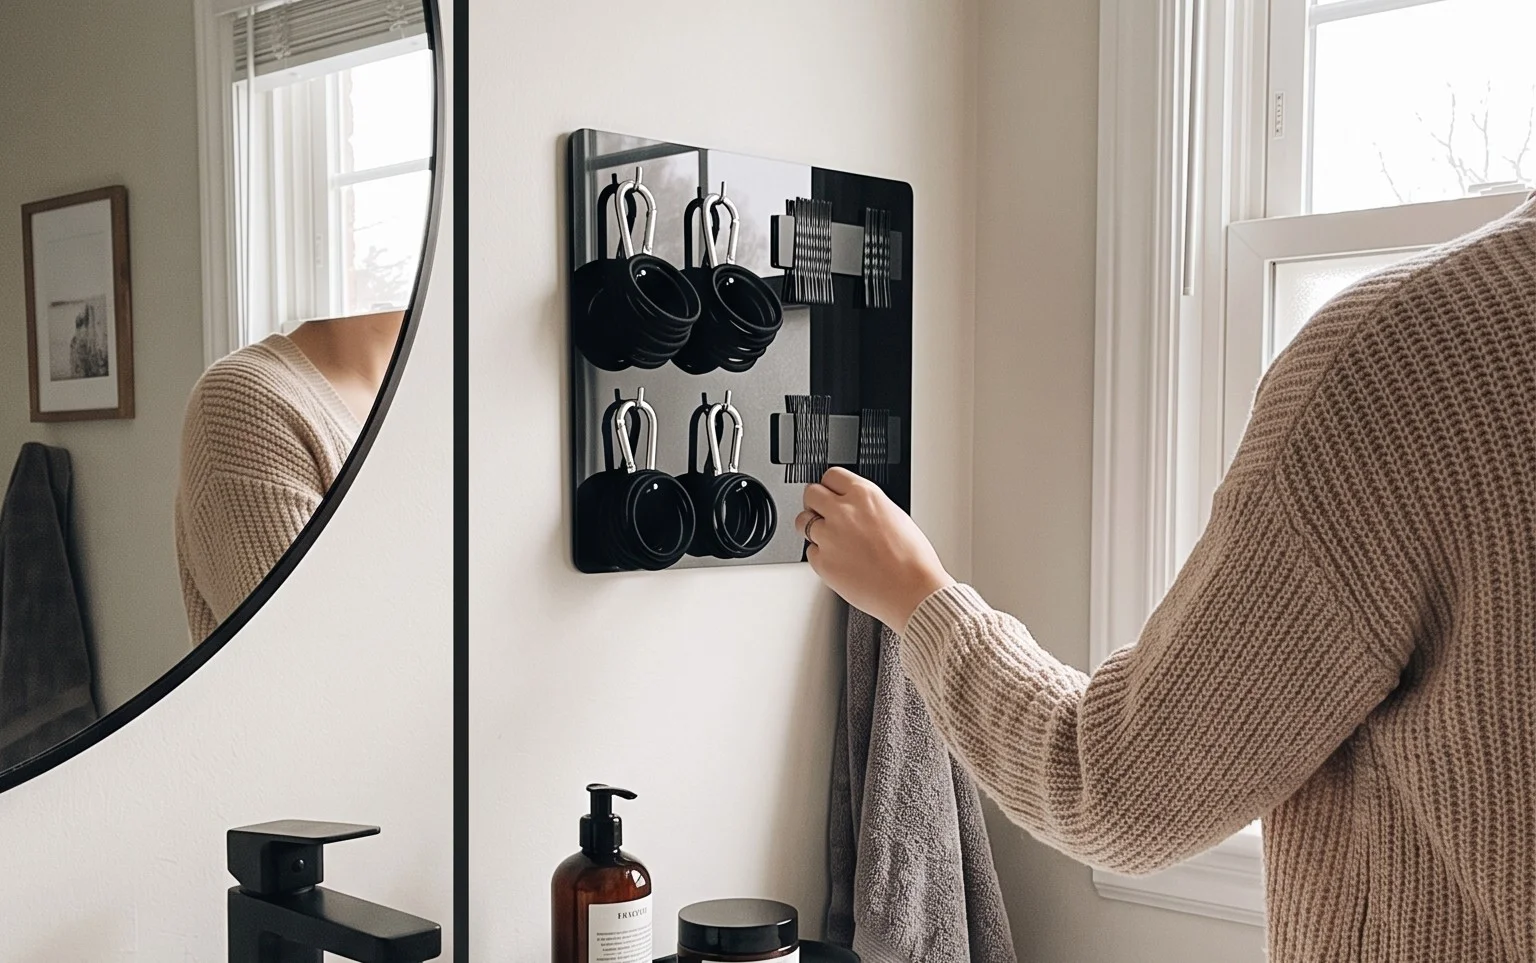
* **Placement Matters:** Hang it on the wall above your vanity or dressing table for easy access. If you have a mirrored wardrobe, it can look great attached to the inside of the door. A free-standing organizer can grace your nightstand or dresser, keeping your essentials within reach.
* **What to Put Where:** This is your chance to be artistic!
* **Bottom Row (for thicker ties):** Place your scrunchies and thicker fabric ties on the lower hooks or dowels.
* **Middle Rows (for standard ties):** Utilize these for your everyday hair ties.
* **Top Row (for delicate ties or clips):** If you have thinner, more delicate ties or even hair clips, use the top row to keep them from getting squashed or tangled.
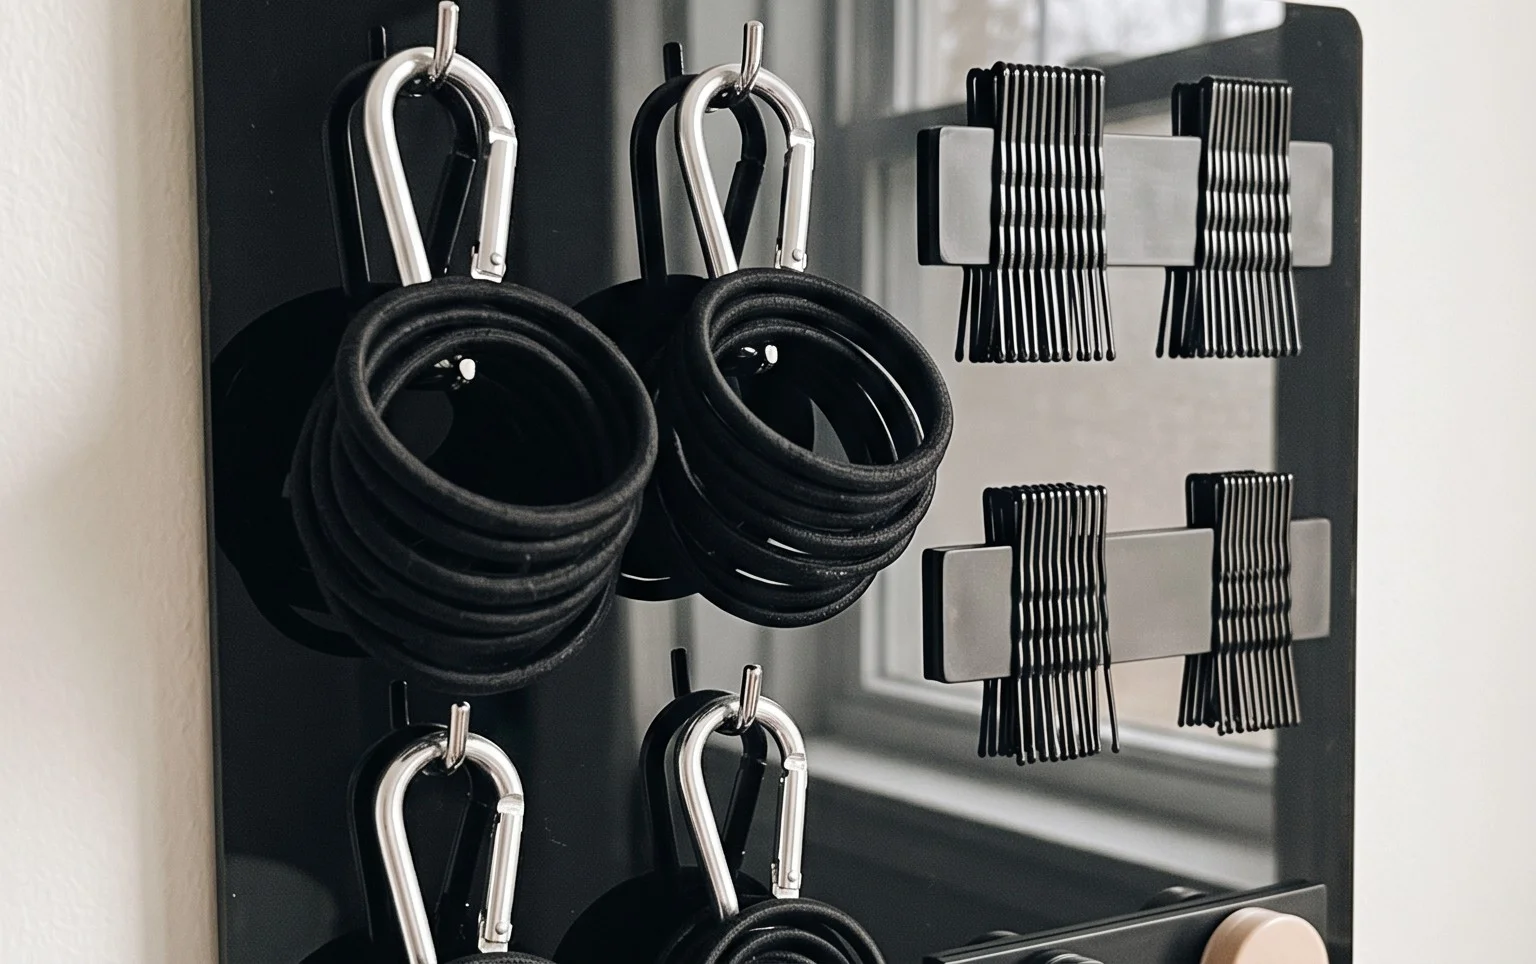
* **Clips and Bobby Pins:** Consider attaching a small fabric pouch or a magnetic strip to the side of your organizer for hair clips and bobby pins.
Remember, the goal is to make it look intentionally styled, even when in use. Don’t cram too many ties onto one hook. Leave some visual space.
### Keeping the Tidy Train Chugging
The first week is the honeymoon phase. Everything is perfectly placed. But how do you maintain that glorious order?
* **The “One In, One Out” Rule:** When you buy new hair ties, try to get rid of an old one. This prevents your collection from spiraling out of control again.
* **Daily Sweep:** Before bed, take 30 seconds to quickly glance at your organizer. Are any ties out of place? Are any new ones just thrown on top? A quick repositioning can make a big difference.
* **Weekly Refresh:** Once a week, take all your hair ties off the organizer and re-hang them. This is a great time to check for any damaged ties and to ensure things are still neatly distributed. You can even give the organizer itself a quick dusting.
* **Seasonal Declutter:** Twice a year, do a more thorough declutter. Go through every single hair tie. Are they still in good condition? Do you even use them? Donate or discard anything that’s worn out or no longer serves you.
### The Pitfalls: When DIY Fails
Even the most well-intentioned DIY projects can go awry. Here are some common mistakes to watch out for with your hair tie organizer:
* **Underestimating Weight:** The biggest offender! If you have a massive collection of thick scrunchies, a flimsy cardboard base or insufficient adhesive will lead to a spectacular (and potentially messy) collapse. Always err on the side of caution and use hardware rated for more than you think you’ll need.
* **Poor Adhesion:** Not cleaning the surface properly before applying Command Strips or glue is a recipe for disaster. Make sure the area is clean, dry, and free of dust or grease. Press firmly for the recommended amount of time.
* **Overcrowding:** While tempting to cram every single hair tie onto the organizer, this defeats the purpose of neatness. Overcrowded hooks will cause ties to stretch out prematurely and make it difficult to remove them. Less is often more for visual appeal and functionality.
* **Ignoring Moisture:** If your organizer is going to be in a humid environment (like a bathroom counter), consider using moisture-resistant paint or sealant, and make sure your base material can handle a little dampness. Cardboard, in particular, is susceptible to water damage.
* **Not Securing Hardware Properly:** For screw-in hooks, if they’re loose, they’ll eventually pull out. Ensure they are screwed in as far as they will go, or reinforced with a backing if on a thinner material.
By following these steps and keeping these potential pitfalls in mind, you’ll create a hair tie organizer that’s not only functional but also a stylish testament to your DIY prowess. Happy organizing!
Conclusion
Say goodbye to the frantic search for that elusive hair tie! Implementing this simple DIY Hair Tie Organiser can genuinely transform your mornings, saving you precious minutes and a whole lot of frustration. Even just gathering a few spare ribbon scraps or a small cardboard tube is your smallest possible first step to a more streamlined routine.
Looking for alternatives? A small mason jar adorned with decorative twine makes for a charming bathroom accent, while a repurposed tin can spray-painted in your favorite color offers a budget-friendly bedside option.
We hope this project inspires you to bring a little more order to your home. Keep exploring our site for more creative decor and organization ideas to make your space both beautiful and functional!